

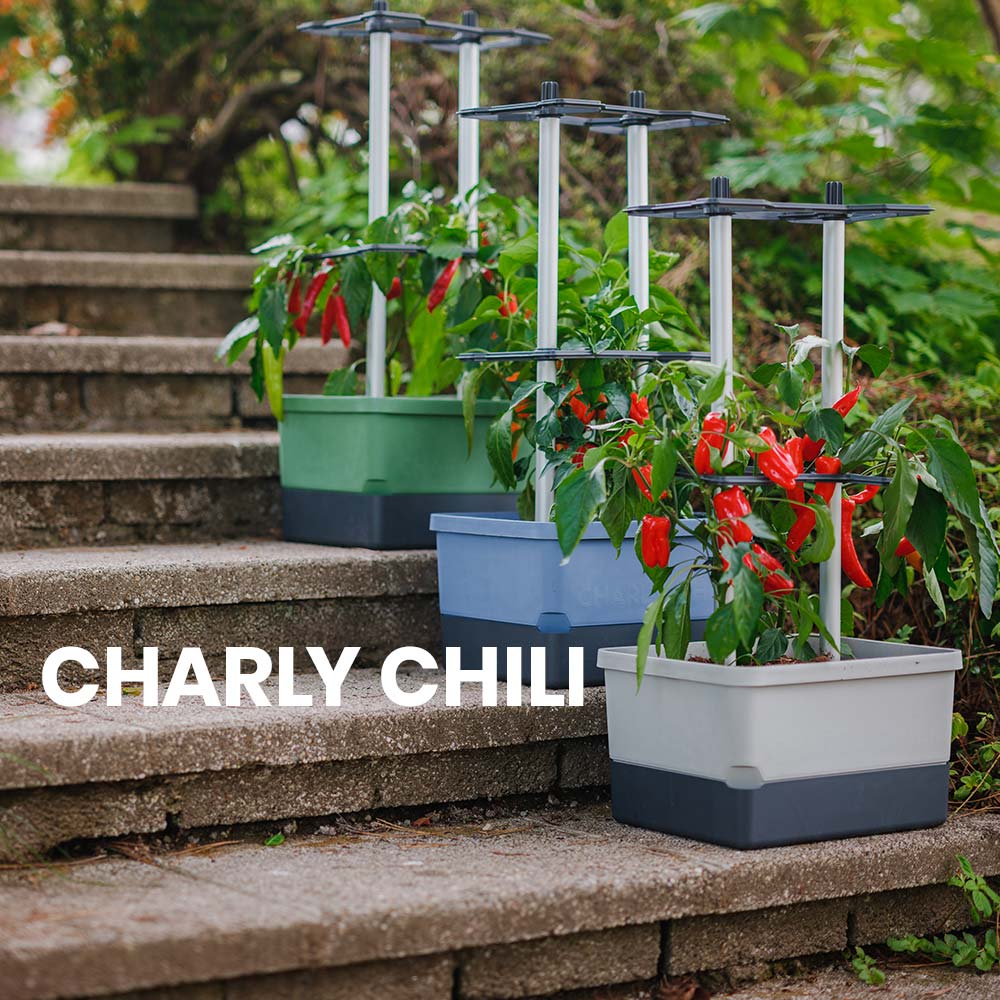
How do I set up CHARLY CHILI?
From mild to fiery - growing your own chilis at home is fun and easy with CHARLY CHILI. The set-up of our chili planter is as simple as growing. This is why we also came up with a sophisticated system for CHARLY CHILI. You get the pot in its individual parts, but the assembly is done in a few minutes.
Here you get to know everything about the quick set-up and the ongoing care of your chili plants. In a few simple steps you can also harvest your own organic chilis on your balcony, terrace or in the garden.
 Time: 15 minutes
Costs: EUR 39.90
Time: 15 minutes
Costs: EUR 39.90
Things needed:
- 10L soil - 2 chili plants - fertilizerTools:
- there are no tools required for CHARLY CHILI set-upCHARLY CHILI set-up:
Step 1:Lead both irrigation wicks through the openings in the bottom of the planter.
 Step 2:
Place the planter onto the water tank.
 Step 3:
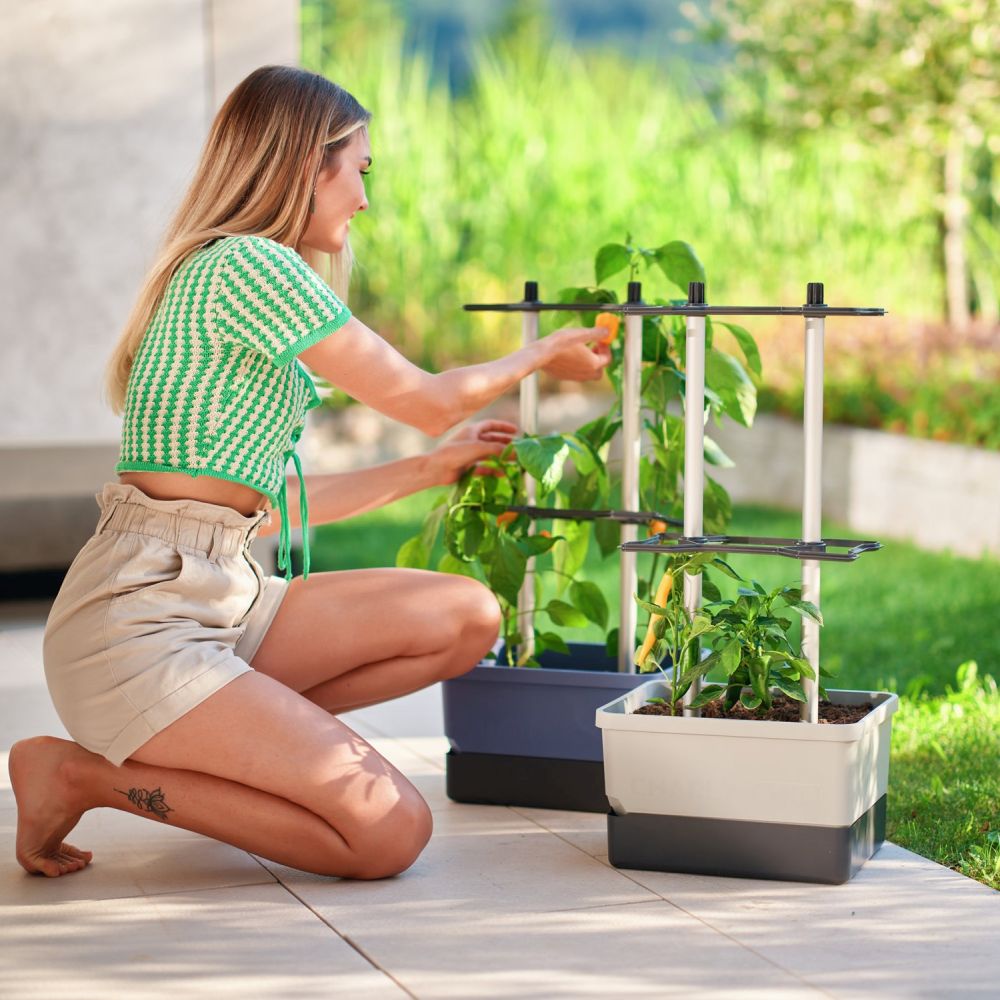
Put one aluminum tube onto the right and one onto the left short raised post in the bottom of the planter.
 Step 4:
First insert one connector on each tube, followed by the first frame.
 Step 5:
Place the other 2 tubes, 2 connectors and the second frame on top.

CHARLY CHILI Growing:
Schritt 1:
Fill CHARLY CHILI with approx. 10 liters of soil. We suggest to mix the soil with an organic long-term fertilizer (e.g. with our organic sheep's wool fertilizer).
 Step 2:
Plant two chili seedlings next to the aluminum tubes.
 Step 3:
Water your plants from above during the first two weeks. Also fill the water tank with approx. 4,5 liters of water.
 Step 4:
As soon as the roots enter the water tank, water your plant via the water tank only. Fill up regularly.
 Step 5:
Make sure that the shoots of the plants always grow inside the climbing frames.

GUSTA GARDEN NEWSLETTER
Mit dem Gusta Garden Newsletter profitierst du nicht nur von exklusiven Rabatten, sondern auch von besonderen Vorteilen, Angeboten und Neuigkeiten. Werde jetzt Teil unserer Community und verpasse keine exklusiven Vorteile und Informationen mehr!